Tuesday, September 18, 2007

Technique #5: Glaze pen resist

This is quite a fun technique and I love using it. You can use it many different ways with different media... make sure you experiment once you understand how it works.

Materials:
  • Sakura white Glaze pen
  • watercolors (you can use ink also)
  • paper
  • stamp (optional)
  • pen & ink, colored pencils, gel pens, markers, ... something to embelish and finish your piece

Steps:

  1. Add some color to your paper (I used one of my hand-carved stamps printed with watercolors)
  2. Draw over your colored background with the white Sakura Glaze pen (I go over the edges of the designs on the paper, making sure the lines I'm drawing are going over the colored paper - not the white). The pen is "saving" the colors you are going over, as it will dry transparent.

  3. Once the glaze pen ink is dry, go over the entire piece with a glaze of watercolors or ink. This will mute the background and make the lines you drew stand out. You can do as many layers as you want.
  4. Once your piece is dry you can embelish it with additional paint, colored pencils, gel pens, pen and ink.... anything you can think of.
  5. Have fun!!!
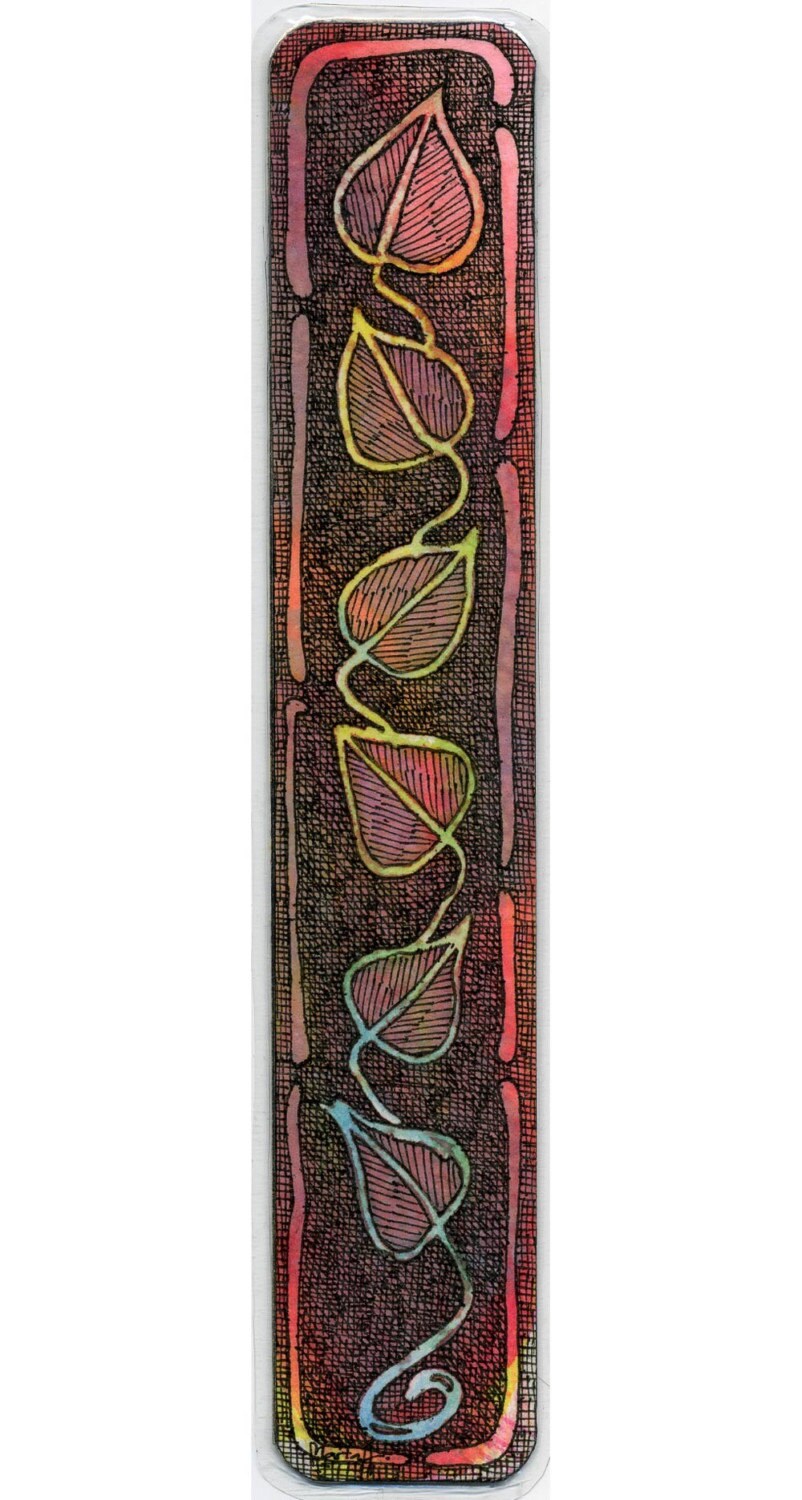
    Here is a finished piece (above) and another at the bottom. Both used this technique with watercolors, colored pencils and pen & ink.
I have a couple of pieces using this technique in my Etsy shop if you want to take a look:
I'm also working on a couple of other pieces, one of them (which I'm really enjoying) using iridescent ink. Please post a comment or email me if you are interested in seeing that piece. I can add it to the post once I'm done.

Saturday, July 07, 2007

ATC Workshop - Bernie Berlin's book

I'm taking the ATC Workshop at the Artists of the Round Table yahoo group based on Bernie Berlin's book. I'm having such a wonderful time!!! This is a picture of one of the ATCs I created with the string technique.

We work on 2 or 3 of the techniques each week, create an ATC from one of the techniques, and post to the whole group. It's wonderful to see how everyone will come up with different ideas and interpretations about the same technique.

If you want to follow my progress through the book, I'm posting my backgrounds and ATCs on my picture trail

Comments are always welcomed.

Saturday, June 30, 2007

Technique #4: Painted Deli Paper

I really should not be posting since I have sooooo much to do, but I felt bad about posting the 7 random facts about myself and not give you a technique. So, here it the technique I used for the technique swap for the Art Techniques group.

Materials:
  • deli paper (mine is called "heavy weight interfolded delicatessen paper " brand is WF8)
  • liquid watercolors
  • Shiva paintsticks
  • foam stamp
  • gesso
  • stamping pad

Steps:

  1. Crumple your deli paper into a ball 2 or 3 times
  2. Lay it flat on a protected surface so you don't get watercolors all over your working surface
  3. Squirt 2 or 3 colors of liquid watercolors onto the paper
  4. Squirt water over the paper so the colors start to mix
  5. Crumple your paper again and squeeze tight so you won't get too much white space
  6. Let dry or use a heat gun as you open your paper carefully and slowly
  7. Once dry, rub Shiva Paintsticks (one or two colors) over the paper so it highlights the peaks and valleys
  8. Dab a foam stamp on gesso and stamp your paper randomly
  9. When adhering to another surface, let some of the wrinkes in the paper and highlight them by rubbing a stamping pad over the wrinkles
That's it! Here are some of the ATCs for the technique swap:

Here are some more examples of papers I made using this technique:

I have used this technique for the background of my nephew's present:

Wednesday, January 03, 2007

Technique #3: Model Magic and stamps

This is very simple and I'm only including it here because several people have asked me how a couple of things were made after looking at my picturetrail albums.

Materials:

  • Model Magic by Crayola (I'll call it "clay")
  • powder (I used cornstarch)
  • stamps (I used my own hand-carved stamps)
  • paints (watercolors, acrylics, rub-ons, Pearl-Ex, whatever you have and want to experiment with)

Steps:

Before you begin, I must say that you can't save unused "clay", so make sure you have enough stamps so you can use the entire contents (I got 4 oz. packages).

  1. roll out the Model Magic to the desired thickness
  2. dust the "clay" with the powder
  3. press the stamp on the "clay"
  4. remove carefully
  5. cut or tear around the stamped "clay"
  6. let dry overnight (see picture below)
  7. brush the powder away
  8. paint the "clay". The "clay" in the picture below was painted with watercolors
  9. go over the raised surfaces with metallic rub-ons or a contrasting color (the picture below was painted with watercolors and the raised surfaces with copper metallic rub-ons)
  10. embelish as desired (in the picture below I used Pearl-Ex with diamond glaze to give the heart some color, then sewed around it with metallic thread). If you sew on Model Magic, don't pull the thread too tight or it will cut through the "clay".

Told you it was easy!!! I hope you enjoy it!!